Deepfakes videos are becoming a growing concern worldwide . These aren't just silly internet jokes anymore; they're super realistic fake videos made by computers that can copy anyone's face and voice perfectly. They're being used more and more to spread lies, trick people out of money, steal identities, political disinformation and mess with reputations. Sometimes its really tough to tell what's real. Since these fakes are getting so good that even we can't tell them apart from real videos, we desperately need a way to fight back.
Goodnews is the same AI technologies that power these fakes are also being actively used to detect and fight them. In this post, we'll explore how AI can be used to fight the deepfake crisis — the challenges, the tools, and the innovations leading the charge.
First things first
What Are Deepfakes?
It is AI-generated synthetic media, usually created using techniques like:
-
GANs (Generative Adversarial Networks)
-
Autoencoders
-
Diffusion models
They can convincingly replicate faces, voices, and gestures. deepfakes makes it really hard to tell what's real.
Why Detection Matters
-
News & Democracy: Fake interviews and political videos undermine public trust.
-
Fraud: Voice deepfakes are now used in scam calls and impersonation.
-
Security: Biometric systems (like face ID) are vulnerable to spoofing.
Now lets talk about how AI Detects Deepfakes
Visual Artifacts Detection
AI models are trained to spot subtle clues like:
-
Inconsistent blinking
-
Unnatural lighting or shadows
-
Flickering backgrounds
-
Warped facial geometry
🔗 GitHub: https://github.com/ondyari/FaceForensics
Temporal Coherence Checking
Deepfake videos often lack consistent motion between frames. AI models like RNNs or 3D CNNs can detect:
-
Jumpy eye movements
-
Unrealistic lip-sync patterns
Multimodal Mismatch Detection
By combining video and audio, models can catch:
-
Misaligned speech and lips
-
Inconsistent tone or voice pitch
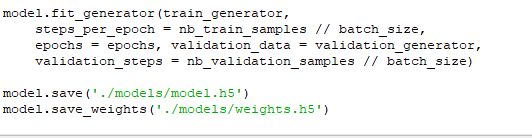
Code Sample: Simple Deepfake Frame Classifier (Using Keras)
import tensorflow as tffrom tensorflow.keras.models import Sequentialfrom tensorflow.keras.layers import Conv2D, MaxPooling2D, Flatten, Densedef build_model():model = Sequential([Conv2D(32, (3, 3), activation='relu', input_shape=(128, 128, 3)),MaxPooling2D(2, 2),Conv2D(64, (3, 3), activation='relu'),MaxPooling2D(2, 2),Flatten(),Dense(128, activation='relu'),Dense(1, activation='sigmoid') # binary classifier: real (0) or fake (1)])model.compile(optimizer='adam', loss='binary_crossentropy', metrics=['accuracy'])return model
Visual Suggestions
Infographic: How a deepfake is made (GAN architecture)
-
Comparison: Real vs deepfake frame closeups (eyes, shadows, teeth)
-
Heatmap: CAM/Grad-CAM output showing AI focus points on the face
-
Timeline: Growth of deepfake incidents over years
-
System diagram: Full pipeline of a deepfake detection system
Bonus: Try It Yourself!
FaceForensics++ Dataset: https://github.com/ondyari/FaceForensics
-
Google Colab Detection Notebook: https://github.com/selimsef/dfdc_deepfake_challenge/blob/master/inference/inference.ipynb
-
Intel FakeCatcher Demo (Real-time blood flow detection): Intel.com
Summary
Deepfakes aren't going away. However, AI isn't backing down either.
With stronger detection systems, transparent media pipelines, and public awareness, we can build a future where truth can still be separated. As creators and developers, we must stay vigilant and informed.