Today we will build a simple supervised algorithm with keras
to classify cars and aeroplanes. We will
implement a simple CNN(convolution Neural Network), which we will train with the
dataset, after the model is generated we can easily classify the images. Here
we are using only two classes, but you can classify as many classes as you
want.
I am using a small dataset. For training 200 images of cars
and 200 images of planes. And for testing 50 images from each class. You can
use your own dataset with different classes if you want.
The dataset contains lot of information or features of the
images we provide. The model learns the distinguishable features from the
data-set in the training process. With that information we can classify the
images. So let’s get started.
We will divide this tutorial in two parts, in part1 we will
learn how to train the data-set and generate the model file and in part2 we
will use this model file to do inference and real classification.
Step 1: Preparing Data-set
You can download the data from my github here: gitHub
Once you have the data-set we need to organize
our data before we start actual training code. Below image shows the structure
of folders for the data.
Photos of Cars:
Photos of Planes:
Step 2: Installing required Packages
- -
Tensorflow > 1.13
- -
Numpy
- -
Keras
Step 3: Implementation
Frist we will import the required libraries
Read
the data-set
Initialize
the CNN and writing the layer… we will have one convolution layer followed by
an
activation function and a pooling. And we will repeat the same.
Flattering, dense layer, dropouts and activation at the end.
Compiling the CNN we shall use the ‘rmsprop’ optimisation
method, binary cross entropy loss function
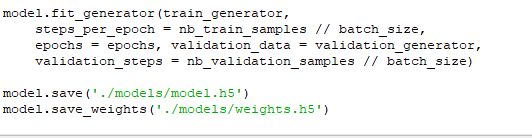
Now
we have feed the images to the CNN we just created
Finally
the classifier, model will be saves as ‘model.h5'
If you run the above code the result should look something
like this-
After 10 epoch is done the model will be save with an accuracy of 96%.
You can download the whole code from my git repository
here: gitHub
Stay tuned for the inference part. Do share your feedback in the comment section. See you soon. Regards.


 You can clone the whole project from github here. Do let me know
if you have any feedback or suggestions. Hope you enjoyed coding with
me. Wish you all a very happy new year 2020 in advace.
You can clone the whole project from github here. Do let me know
if you have any feedback or suggestions. Hope you enjoyed coding with
me. Wish you all a very happy new year 2020 in advace.